
If you’re searching for a dessert that’s every bit as dreamy as it sounds, look no further than the Chocolate & Peanut Butter Dream Roll. This delectable cake roll unites the irresistible duo of rich chocolate and creamy peanut butter, all wrapped up in a light, cloud-like sponge and studded with fun candy bits. Whether you grew up loving peanut butter cups or simply crave a show-stopping treat for your next celebration, the Chocolate & Peanut Butter Dream Roll is your ticket to dessert bliss.
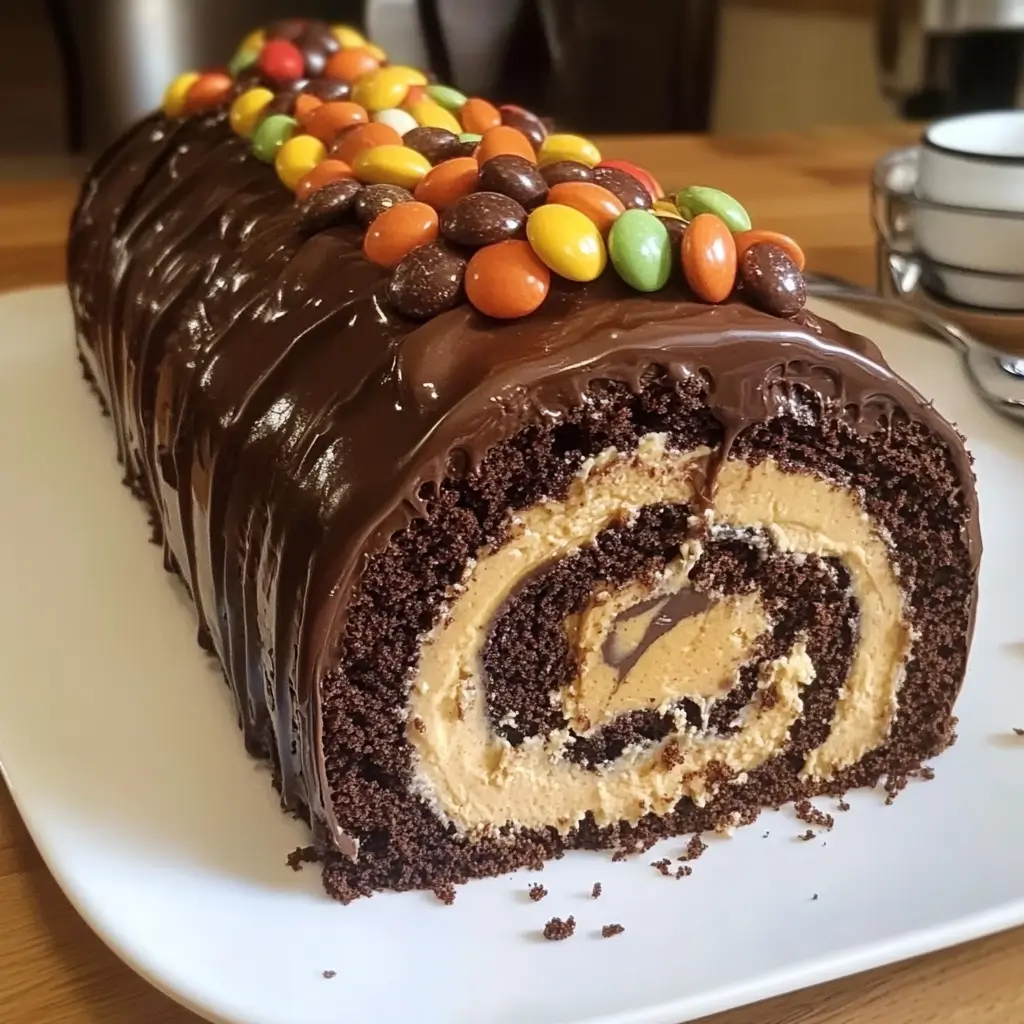
Picture this: A melt-in-your-mouth chocolate sponge—light, tender, and deeply chocolaty—gives way to a lusciously smooth peanut butter filling swirled with a hint of sweetness. Adding a pop of whimsy and color, candy pieces dot each bite with tiny bursts of crunch and flavor. The Chocolate & Peanut Butter Dream Roll isn’t just a feast for your tastebuds, but for your eyes too, making it an instant crowd-pleaser for birthdays, holidays, and bake sales.
Why does this dessert stand apart from the rest? Beyond its drool-worthy flavor, the Chocolate & Peanut Butter Dream Roll is surprisingly easy to create at home (no fancy equipment or hours of labor required!). With the right tips and a step-by-step guide, even novice bakers can achieve that coveted swirl and a bakery-worthy finish. Best of all, this recipe lets you get creative—think chopped Reese’s, sprinkles, or even pretzel bits for a sweet-and-salty twist.
If you’re ready to wow family, friends, or just indulge yourself, dive into the step-by-step process below. By the end of this post, you’ll know exactly how to make your own Chocolate & Peanut Butter Dream Roll—so tie on your apron and let’s get baking!
Table of Contents
Why You’ll Love Chocolate & Peanut Butter Dream Roll
The Chocolate & Peanut Butter Dream Roll deserves its name—it’s a dreamy confection you’ll want to make on repeat. If you cherish the classic combination of chocolate and peanut butter, this cake roll will easily top your favorites. The first bite delivers a contrast of textures: a fluffy, airy chocolate cake with a creamy, nutty spiral of peanut butter filling, all adorned with playful candy bits. Every mouthful is a symphony of flavor.
Whether you’re looking for the “wow” factor for a birthday or potluck, or just want a comforting dessert (with a nostalgic throwback to your favorite peanut butter cups), the Chocolate & Peanut Butter Dream Roll satisfies at every level. Its impressive presentation hides a simple process—this roll comes together with staple pantry ingredients, and with a few pro tips, you’ll master that swirl with ease.
You’ll especially love this recipe because it’s:
- Elegant yet easy—a cake roll always impresses
- Fully customizable with mix-ins and toppings
- Lighter than a layer cake, but just as indulgent
- Make-ahead friendly (a great choice for busy hosts)
- Perfect for peanut butter and chocolate lovers alike
Who knew a simple sponge could pack this much flavor and fun? Let’s explore the ingredients you’ll need to bring the Chocolate & Peanut Butter Dream Roll to life in your own kitchen.
Ingredients for Chocolate & Peanut Butter Dream Roll
Here’s the full ingredient lineup for your Chocolate & Peanut Butter Dream Roll. Feel free to consult the “Additions & Substitutions” section below if you want to explore creative swaps or adjust to dietary needs.
For the Chocolate Sponge Cake:
- 4 large eggs (room temperature, for best volume)
- ½ cup granulated sugar
- 1 cup all-purpose flour (sifted for a tender crumb)
- ½ cup unsweetened cocoa powder (Dutch-processed recommended for depth)
- 1 teaspoon baking powder
- ¼ teaspoon salt
- ¼ cup milk (whole or 2% for richness)
- ¼ cup vegetable oil (canola or sunflower oil also work)
- 1 teaspoon pure vanilla extract
For the Peanut Butter Filling:
- 1 cup creamy peanut butter (natural or regular)
- 4 tablespoons unsalted butter (softened)
- 1 cup powdered sugar (sifted for smoothness)
- 2 tablespoons heavy cream (for fluffy texture)
- ½ teaspoon vanilla extract
- Pinch salt (optional, to enhance flavor)
For Assembly & Decoration:
- ½ cup candy-coated chocolate pieces (such as M&Ms or Reese’s Pieces, chopped)
- Optional: mini peanut butter cups, chocolate chips, or sprinkles
- Powdered sugar (for dusting)
- Additional chocolate drizzle or melted peanut butter for garnish
Keep these ingredients handy to assemble your Chocolate & Peanut Butter Dream Roll with ease. Each element works in harmony to create a dessert that’s rich in flavor and visual appeal.
Necessary Tools
A perfectly rolled cake begins with proper tool prep. Here’s everything you’ll need to craft the Chocolate & Peanut Butter Dream Roll:
- Jelly roll pan (about 15×10 inches): ensures the cake is thin and flexible for rolling
- Parchment paper: vital for easy cake removal and rolling
- Large mixing bowls: one for whipping eggs, one for folding the batter
- Electric mixer or stand mixer: for aerating eggs and blending filling
- Rubber spatula: for gentle folding and scraping bowls clean
- Measuring cups and spoons: accuracy counts, especially for the sponge
- Sifter or fine-mesh sieve: creates a lump-free, tender cake crumb
- Clean kitchen towel: for rolling the warm cake to prevent cracks
- Offset spatula: for evenly spreading filling on the sponge
- Sharp knife: for trimming edges and slicing the finished roll
- Optional: sieve for dusting powdered sugar, piping bag for decorative garnish
Once you’ve assembled your tools and ingredients, the process for making the Chocolate & Peanut Butter Dream Roll is as enjoyable as eating the result!
Ingredient Additions & Substitutions
One of the biggest joys in making the Chocolate & Peanut Butter Dream Roll is how adaptable it can be. Whether you’re accommodating allergies, personal preferences, or just feeling creative, here are plenty of ways to make this cake your own:
Chocolate Sponge Variations:
- Gluten-Free: Swap the all-purpose flour for a measure-for-measure gluten-free blend. Be sure to check your baking powder and other ingredients for hidden gluten.
- Deeper Chocolate Flavor: Use dark cocoa powder or add 2 ounces of melted dark chocolate to the sponge batter for a more pronounced chocolate note.
- Coffee Kick: Dissolve 1 teaspoon instant espresso in the milk before adding—it deepens the chocolate flavor without overwhelming the cake.
- Spiced Sponge: Add ½ teaspoon of cinnamon or a pinch of cayenne for a Mexican hot chocolate-inspired dessert.
Filling Twists:
- Almond or Cashew Butter: For those with peanut allergies or a different flavor preference, substitute with almond, cashew, or sunflower seed butter. Creamy options work best for ideal texture.
- Nutella Dream: Replace half the peanut butter with chocolate-hazelnut spread for a “choco-nut” filling.
- Lighter Filling: For a less rich alternative, replace half the butter with Greek yogurt or softened cream cheese.
- Vegan-Friendly: Use plant-based butter and dairy-free cream; replace eggs in the sponge with a commercial egg substitute or aquafaba (whipped chickpea water). Opt for vegan-friendly candies.
Candy Add-Ins:
- Crunch Factor: Swap candy-coated chocolate pieces for mini peanut butter cups, chopped pretzels, or chopped toffee bars.
- Fruit Fusion: Add a layer of seedless raspberry jam under the peanut butter filling for a PB&J-inspired dream roll.
- Seasonal Touch: Use crushed peppermint candies for a festive twist, or top with toasty marshmallows for s’mores vibes.
- Extra Chocolate: Fold mini chocolate chips into the sponge or filling for added pops of chocolate.
Miscellaneous Substitutions:
- Milk Alternatives: Dairy-free milk (such as oat, almond, soy, or coconut) works in both the sponge and filling.
- Oil Swaps: Melted coconut oil gives a subtle flavor if you want a tropical hint.
- Sugar-Free Options: Granulated sugar substitutes and powdered erythritol or monk fruit can be used for those seeking a lower-sugar treat, though texture may vary slightly.
When making ingredient swaps, pay attention to the texture—aim to maintain the moistness of the cake and the creaminess of the filling. The beauty of the Chocolate & Peanut Butter Dream Roll is that it’s a blank slate for your flavor fantasies!
How to Make Chocolate & Peanut Butter Dream Roll
Creating a beautiful Chocolate & Peanut Butter Dream Roll at home is simpler than it seems. The process includes making a pillowy chocolate sponge, preparing a creamy peanut butter filling, rolling the cake while it’s warm, and finishing with fabulous decorations. Ready to roll? Follow these step-by-step instructions for a foolproof cake every time.
Step 1: Preheat and Prepare
Preheat your oven to 350°F (175°C). Line your jelly roll pan with parchment paper, ensuring the paper extends over the sides for easy cake removal. Lightly grease the paper to prevent sticking. Set aside.
Step 2: Whip the Eggs and Sugar
Place the eggs in a large mixing bowl and beat with an electric mixer at medium-high speed until frothy, about 1 minute. Gradually add the granulated sugar, continuing to beat until the mixture triples in volume—this may take 5 to 7 minutes. The mixture should be pale, thick, and form ribbons when lifted.
Step 3: Combine Dry Ingredients
In a separate bowl, sift together the all-purpose flour, cocoa powder, baking powder, and salt. Sifting ensures a lump-free, soft crumb.
Step 4: Fold and Finish the Batter
Gently fold the dry ingredients into the beaten eggs using a rubber spatula, being careful not to deflate the mixture. Next, whisk together the milk, oil, and vanilla extract; drizzle this mixture over the batter and fold until just incorporated. Do not overmix.
Step 5: Bake the Chocolate Sponge
Pour the batter into the prepared pan, spreading it evenly with an offset spatula. Tap the pan gently on the counter to release any air bubbles. Bake for 10-12 minutes, or until the cake springs back when touched and pulls away from the edges slightly.
Step 6: Roll the Cake (While Warm!)
Lay a clean kitchen towel on the counter and dust it generously with powdered sugar. When the cake emerges from the oven, immediately invert it onto the towel and carefully peel off the parchment. Starting from a short side, roll the cake (with the towel inside) into a tight log. Let it cool completely in this rolled shape—this trains the sponge to hold its swirl without cracking.
Step 7: Make the Peanut Butter Filling
In a bowl, beat together peanut butter and softened butter until smooth and creamy. Add powdered sugar and beat, starting slow and increasing speed. Blend in heavy cream and vanilla extract; continue beating until fluffy but spreadable. Add an extra spoonful of cream if needed.
Step 8: Unroll, Fill, and Add Candy Bits
Once the cake is completely cool, gently unroll it. Spread the peanut butter filling evenly over the entire surface, leaving a ½-inch border. Sprinkle chopped candy pieces (reserve some for the top) all over the filling.
Step 9: Re-Roll and Decorate
Carefully re-roll the cake (without the towel) into a log. Transfer it seam-side down onto a serving platter. If desired, melt chocolate or peanut butter and drizzle over the top, then scatter with reserved candy pieces, mini peanut butter cups, or extra sprinkles.
Step 10: Chill and Slice
Refrigerate the completed roll for at least 30 minutes before slicing. This sets the filling and ensures clean, beautiful pieces when you cut.
Serving Suggestions
Your Chocolate & Peanut Butter Dream Roll is ready to steal the spotlight! Serve thick slices as the grand finale to a dinner party, or cut thinner rounds for a sweet-tooth-pleasing afternoon snack. For a striking presentation, dust lightly with powdered sugar or plate each slice with a swirl of whipped cream and a few extra candy pieces.
Pair this dream roll with a tall glass of milk for a nostalgic treat, or elevate it with a scoop of vanilla or salted caramel ice cream. It’s also sensational with fresh berries—the tartness of raspberries or strawberries pairs beautifully with the richness of the chocolate and peanut butter.
Hosting brunch or a birthday? Display the Chocolate & Peanut Butter Dream Roll on a cake stand, and let guests slice their own. For an added touch, pipe little rosettes of whipped cream or extra filling along the top, finishing with festive sprinkles or more chopped candies.
Pro Tips & Tricks
- Room Temperature Eggs: Bringing your eggs to room temperature before beating helps the batter achieve maximum volume, resulting in a lighter sponge.
- Don’t Overbake: The cake should be just set and slightly springy—overbaking will lead to cracks when rolling.
- Roll While Warm: Rolling the cake while it’s still warm (using the towel technique) prevents splitting and helps it “remember” its shape.
- Cool Completely: Never spread the filling until the roll is fully cool, or the butter in the filling will melt and become greasy.
- Clean Slices: Dip your knife in hot water and wipe it dry between slices for perfect, bakery-style pieces.
- Creative Garnish: Let kids help decorate the roll with their favorite candies or sprinkles for a fun family project.
- Make Ahead: The filled and rolled cake can be made a day ahead! Simply wrap tightly and chill in the fridge until ready to serve.
- Crack Fix: If your cake cracks, don’t fret—use icing or extra filling to “glue” it back together or cover with a generous dusting of powdered sugar.
Master these tips, and your Chocolate & Peanut Butter Dream Roll will look and taste like it came straight from a pâtisserie.
Storage Instructions
The Chocolate & Peanut Butter Dream Roll stores beautifully. Wrap any leftovers tightly in plastic wrap or foil to keep the cake moist and prevent drying. Refrigerate for up to 4 days—just allow slices to warm slightly to
Related Recipes You’ll Love
Italian Cream Sheet Cake Sinfully Good and Easy
Rich and Moist Chocolate Cake

Chocolate & Peanut Butter Dream Roll
- Total Time: 2 hours (including cooling and chilling time)
- Yield: 10–12 servings 1x
- Diet: Vegetarian
Description
A delectable cake roll that unites rich chocolate and creamy peanut butter, wrapped in a light, cloud-like chocolate sponge and studded with candy bits. Perfect for birthdays, holidays, and bake sales, this impressive yet easy-to-make dessert will satisfy any chocolate and peanut butter lover.
Ingredients
- 4 large eggs, room temperature
- ½ cup granulated sugar
- 1 cup all-purpose flour, sifted
- ½ cup unsweetened cocoa powder, Dutch-processed recommended
- 1 teaspoon baking powder
- ¼ teaspoon salt
- ¼ cup milk (whole or 2%)
- ¼ cup vegetable oil
- 1 teaspoon pure vanilla extract
- 1 cup creamy peanut butter
- 4 tablespoons unsalted butter, softened
- 1 cup powdered sugar, sifted
- 2 tablespoons heavy cream
- ½ teaspoon vanilla extract
- Pinch salt (optional)
- ½ cup candy-coated chocolate pieces (M&Ms or Reese’s Pieces, chopped)
- Powdered sugar for dusting
- Optional: mini peanut butter cups, chocolate chips, or sprinkles
- Optional: chocolate drizzle or melted peanut butter for garnish
Instructions
- Preheat oven to 350°F (175°C). Line a jelly roll pan (15×10 inches) with parchment paper, extending over the sides. Lightly grease the paper.
- Beat eggs in a large mixing bowl at medium-high speed until frothy (about 1 minute). Gradually add sugar, continuing to beat until mixture triples in volume (5-7 minutes) and forms ribbons when lifted.
- In a separate bowl, sift together flour, cocoa powder, baking powder, and salt.
- Gently fold dry ingredients into the beaten eggs using a rubber spatula, being careful not to deflate the mixture.
- Whisk together milk, oil, and vanilla extract; drizzle over the batter and fold until just incorporated. Do not overmix.
- Pour batter into the prepared pan, spreading evenly with an offset spatula. Tap the pan gently to release air bubbles.
- Bake for 10-12 minutes, until cake springs back when touched and pulls away from edges slightly.
- Lay a clean kitchen towel on the counter and dust generously with powdered sugar. Immediately invert cake onto the towel and carefully peel off parchment.
- Starting from a short side, roll the cake (with towel inside) into a tight log. Let cool completely in this rolled shape.
- Make the filling: Beat peanut butter and softened butter until smooth and creamy. Add powdered sugar, beating from slow to high speed. Blend in heavy cream and vanilla extract until fluffy but spreadable.
- Once cake is completely cool, gently unroll it. Spread peanut butter filling evenly over entire surface, leaving a ½-inch border.
- Sprinkle chopped candy pieces (reserve some for the top) over the filling.
- Carefully re-roll the cake (without the towel) into a log. Place seam-side down on a serving platter.
- If desired, drizzle with melted chocolate or peanut butter and scatter with reserved candy pieces.
- Refrigerate for at least 30 minutes before slicing to set the filling.
Notes
- Room temperature eggs help achieve maximum volume for a lighter sponge.
- Don’t overbake the cake or it will crack when rolling.
- Always roll the cake while it’s warm using the towel technique to prevent splitting.
- Cool completely before adding filling to prevent the butter from melting.
- For clean slices, dip your knife in hot water and wipe dry between cuts.
- The cake can be made a day ahead – wrap tightly and refrigerate until serving.
- If the cake cracks, use icing or extra filling to ‘glue’ it back together.
- Leftovers can be refrigerated for up to 4 days when wrapped tightly.
- Prep Time: 30 minutes
- Cook Time: 12 minutes
- Category: Dessert
- Method: Baking
- Cuisine: American
Nutrition
- Serving Size: 1 slice
- Calories: 350
- Sugar: 25g
- Sodium: 180mg
- Fat: 22g
- Saturated Fat: 8g
- Unsaturated Fat: 12g
- Trans Fat: 0g
- Carbohydrates: 35g
- Fiber: 2g
- Protein: 8g
- Cholesterol: 75mg